Extract Screenshots from Video — The Pythonic Way


Convert your video to images using Python.
MoviePy is an extremely useful library when dealing with video files. It’s built on top of FFmpeg.
MoviePy is a Python module for video editing, which can be used for basic operations (like cuts, concatenations, title insertions), video compositing (a.k.a. non-linear editing), video processing, or to create advanced effects. It can read and write the most common video formats, including GIF.
Video
Let’s get started
Install moviepy from here. The library also requires a few external software like ImageMagick. You can download it from here.
config.py
import os

ABS_PATH = os.path.abspath(__file__)
BASE_DIR = os.path.dirname(ABS_PATH)
SAMPLE_INPUTS = os.path.join(BASE_DIR, "inputs")
SAMPLE_OUTPUTS = os.path.join(BASE_DIR, 'outputs')
I created a config file that we can use later in our main.py for ease of code.
video.py
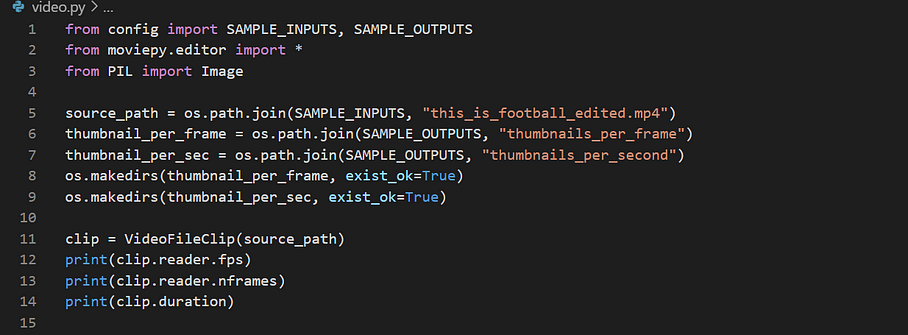
from config import SAMPLE_INPUTS, SAMPLE_OUTPUTS
from moviepy.editor import *
from PIL import Image

source_path = os.path.join(SAMPLE_INPUTS, "this_is_football_edited.mp4")
thumbnail_per_frame = os.path.join(SAMPLE_OUTPUTS, "thumbnails_per_frame")
thumbnail_per_sec = os.path.join(SAMPLE_OUTPUTS, "thumbnails_per_second")
os.makedirs(thumbnail_per_frame, exist_ok=True)
os.makedirs(thumbnail_per_sec, exist_ok=True)
Importing the required libraries. The name of the video is this_is_football_edited.mp4 in my case. We’re creating directories if they don’t exist.
clip = VideoFileClip(source_path)
print(clip.reader.fps)
print(clip.reader.nframes)
print(clip.duration)

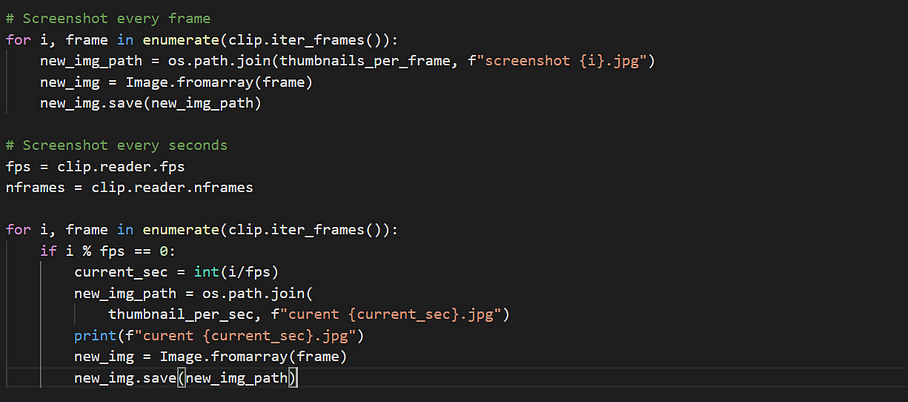
for i, frame in enumerate(clip.iter_frames()):
     new_img_path = os.path.join(thumbnails_per_frame, f"screenshot       {i}.jpg")
     new_img = Image.fromarray(frame)
     new_img.save(new_img_path)
Iterating through clip.iter_frames() will give us the frame for each video. Each frame contains a numpy array. If you’re coming from machine learning or computer vision background this will sound familiar. Basically each frame contains a huge numpy array containing the pixel values color for each iterated frame in the video.
Using Image.fromarray(frame) we convert the numpy array to an Image. Next, we save the image to the new_img_path directory as shown.
The problem with the above code is that we are saving the screenshots every frame. In my case, the video is 106 seconds long with a total of 3205 frames. That means I will get 3205 total screenshots from the video.
Screenshots every sec

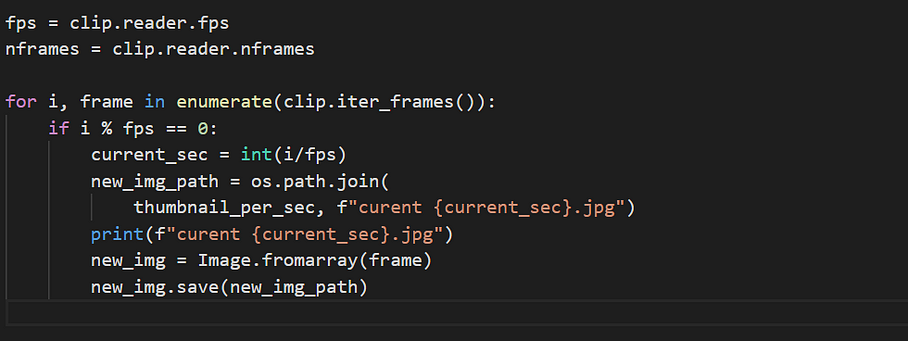
The rest of the code remains the same. The if condition makes sure that the image is saved each second.
Code

Extract image every frame and every second

Output

That’s it for today. See you soon.