A Comprehensive Guide to Install Discourse for Development on Docker Using Vagrant


This article is for all the newbies or beginners trying to install Discourse for development with absolutely no knowledge of vagrant, docker, ruby, or PostgreSQL on Windows 10 Home machine.
This is a complete beginner’s guide and I assume you don’t have any experience working with vagrant, docker, or Linux let alone installing discourse.
After wrapping my head for 3 days straight, reading tons of documentation, forums, going through numerous StackOverflow link, I finally cracked it. I installed Discourse on my windows 10 machine using vagrant. I decided to write an article, hoping someone might stumble upon it and hopefully find it useful.
Enough talk, let’s get straight into it.
Let’s call this section introduction to Vagrant
For all those developers who never heard of the name before,
Vagrant is a tool for building and managing virtual machine environments in a single workflow. With an easy-to-use workflow and focus on automation, Vagrant lowers development environment setup time, increases production parity, and makes the “works on my machine” excuse a relic of the past.
If that doesn’t make any sense to you, don’t worry, I’ve got you covered. Vagrant basically allows you to install ubuntu or any other Linux/Mac os on your laptop without affecting the host OS. Instead of providing GUI like Oracle virtual box, it provides a more cmd or command-line interface. This means you have to write Unix commands to interact with the vagrant VM (virtual machine).
But why should I use vagrant ?
Vagrant is widely used to separate your development environment with your host OS. Drawing a boundary between your development environment is imperative to avoid breakage. Vagrant allows you to fire up a VM machine for your project so that it’s doesn’t interact with other environments. Each VM machine provides you with a virtual environment having its own OS, drivers, and all those stuff.
Ok, let me try to explain with an example, Discourse uses Ruby on rails for backend, Ember.js for frontend, database is on PostgreSQL and Redis for the cache. So to run discourse for development you need to go through the installation process for each of the mentioned programming languages. But what if you don’t use those languages. Maybe, you just need to get discourse up and running, play with it and decide if it suits your needs.
“I’m a react developer, why should I install all this stuff?”
Exactly my point. Wouldn’t it be wise to fire up a Linux os, install all this stuff on it, and delete it once you’re done playing with discourse? Plus, your host os wouldn’t be affected by all of this. How amazing.
Still here? Ok, great. Let’s first install vagrant. Click here to install vagrant. The installation process is mundane, the same old generic software installation setup. After installation, restart your laptop. Open terminal
vagrant — versionVagrant File
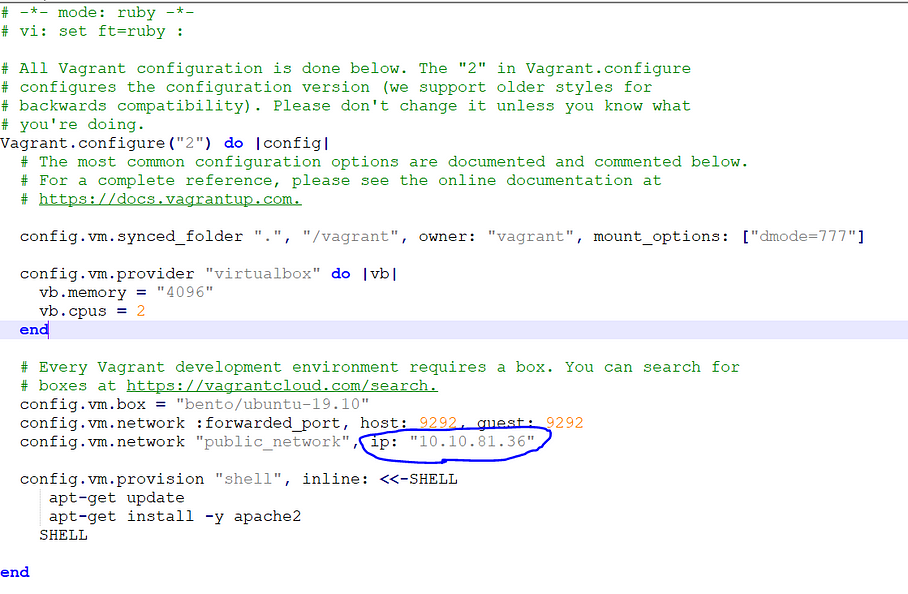
Navigate to your working directory and type vagrant init. A file called Vagrantfile will be created. Open the file, remove all the content and replace it with
# -*- mode: ruby -*-
# vi: set ft=ruby :
# All Vagrant configuration is done below. The “2” in Vagrant.configure
# configures the configuration version (we support older styles for
# backwards compatibility). Please don’t change it unless you know what
# you’re doing.
Vagrant.configure(“2”) do |config|
 # The most common configuration options are documented and commented below.
 # For a complete reference, please see the online documentation at
 # https://docs.vagrantup.com.

 config.vm.synced_folder “.”, “/vagrant”, owner: “vagrant”, mount_options: [“dmode=777”]

 config.vm.provider “virtualbox” do |vb|
 vb.memory = “4096”
 vb.cpus = 2
 end

# Every Vagrant development environment requires a box. You can search for
 # boxes at https://vagrantcloud.com/search.
 config.vm.box = “bento/ubuntu-19.10”
 config.vm.network :forwarded_port, host: 9292, guest: 9292
 config.vm.network “public_network”, ip: “10.10.81.36”
config.vm.provision “shell”, inline: <<-SHELL
 apt-get update
 SHELL
end
Vagrant config file is really important and must be set up correctly to avoid unnecessary errors. Replace your public network IP with your own IP as shown below.
If you don’t know how to find your laptop’s IP. Go to the wifi settings and look for
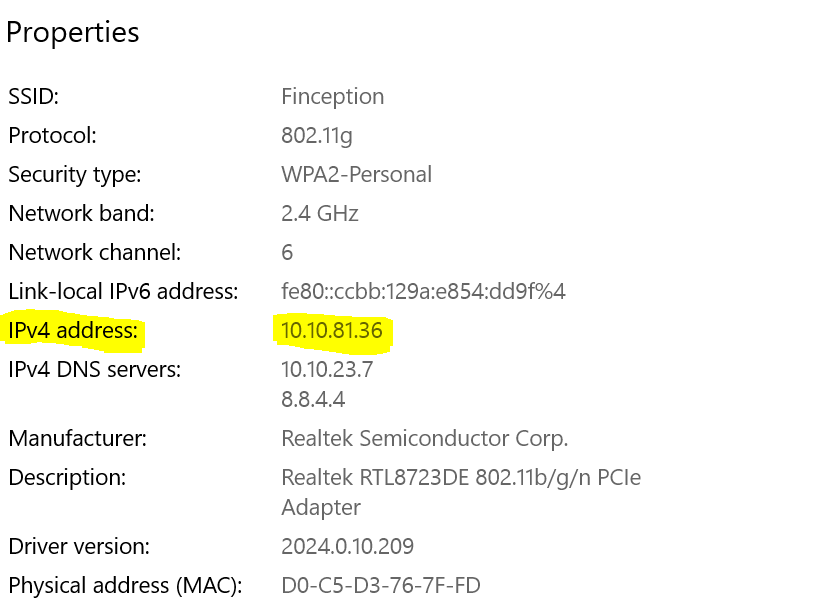
Replace config.vm.network public_network, ip: your_own_IP with the above image.
Once you’re done. (make sure you’re in the working directory and Vagrantfile is in the root of the directory. Type
vagrant upWait for some time and you’ll see something like

Note: Vagrant will check for bento/ubuntu-19.10 which is mentioned in the VagrantFile config.
You are free to choose any other vagrant box for eg, ubuntu/trusty64, ubuntu/xenial64, hashicorp/precise64. But I’ll strongly recommend sticking with one mentioned in the config file i.e bento/ubuntu-19.10.
Vagrant first checks if the box is already available, if yes, it directly imports the box, else it downloads the box from the vagrant cloud and then imports it.
If you don’t already have “bento/ubuntu-19.10” you will find something like
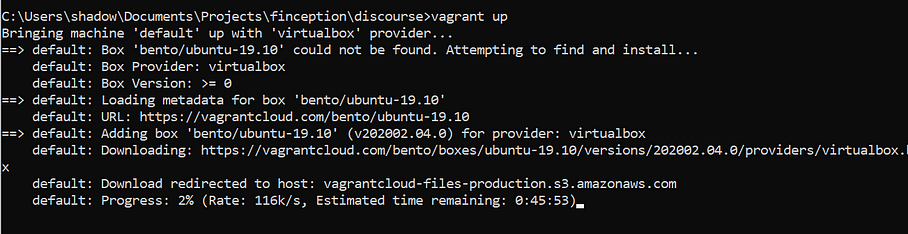
The command “vagrant up” triggers up Vagrant to boot up the box (“bento/ubuntu-19.10”), run few scripts (based on VagrantFile config), and make it ready for use.
Once, you’re done run
vagrant ssh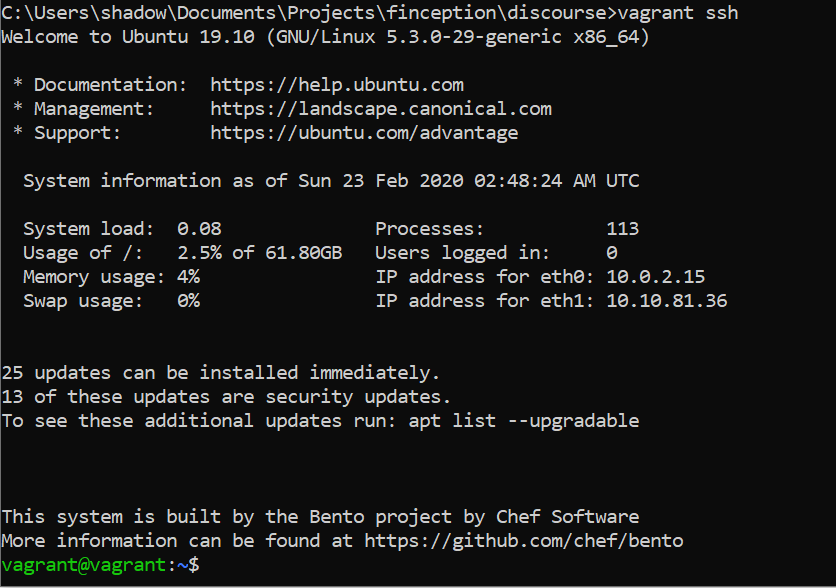
Vagrant ssh commands take you inside your ubuntu OS and provide you the interface to interact with the guest os. Any command you write from now on will be executed in your Ubuntu 19 os. How awesome is that?
Installing Docker
Docker is a set of platform as a service products that use OS-level virtualization to deliver software in packages called containers. Containers are isolated from one another and bundle their own software, libraries and configuration files; they can communicate with each other through well-defined channels.
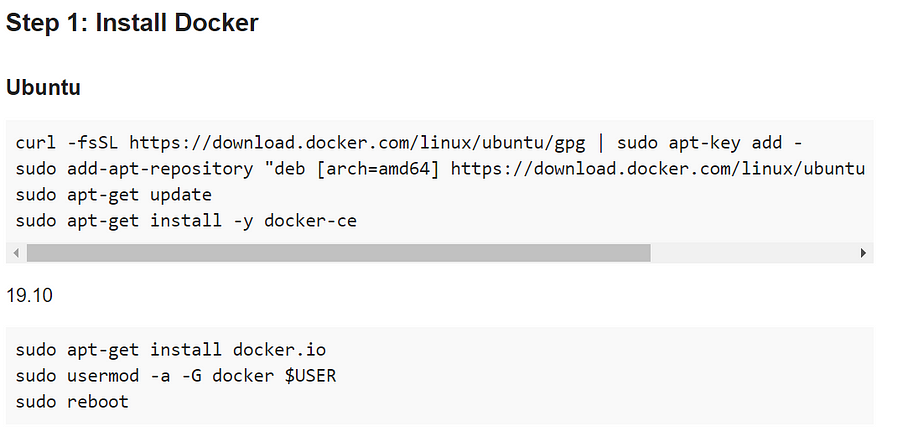
For Ubuntu 19 (“bento/ubuntu-19.10”) users:
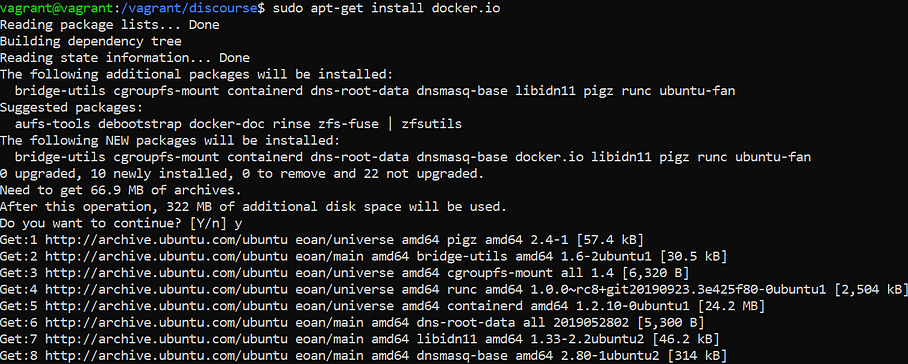
- sudo apt-get install docker.io
- sudo usermod -a -G docker $USER
- sudo reboot
Steps 2 and 3 are really important. They give you root user access. Make sure you execute them correctly.

-
After sudo reboot you have to again login to your ubuntu machine with vagrant ssh (If you get “ssh_exchange_identification: read: Connection reset error” type vagrant ssh again and you’re good to go)
-
Check if Docker is correctly installed
docker --version(Make sure you’ve logged into your machine with vagrant ssh )
Installing Discourse
cd /vagrant

git clone https://github.com/discourse/discourse.git
(if you get an error like “fatal: could not create work tree dir ‘discourse’: Permission denied” use
sudo git clone https://github.com/discourse/discourse.git

cd discourse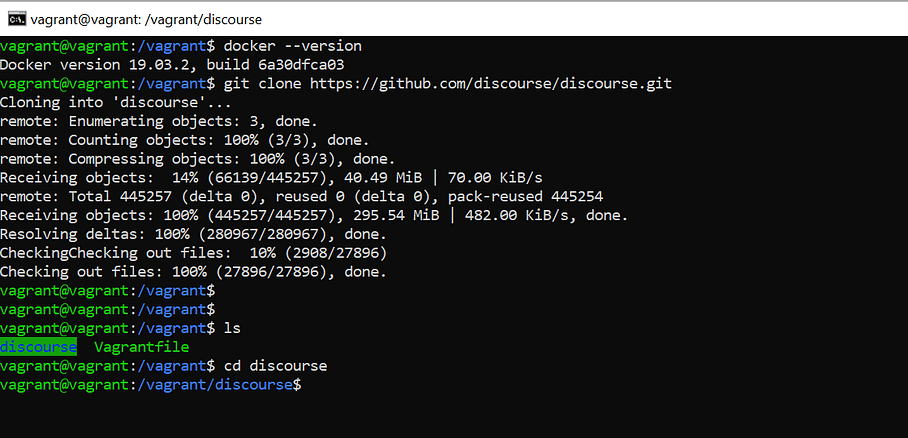
d/boot_dev — initNow, slow down. This could be troublesome.
So this command will download the discourse docker image and install all the gems. If you don’t know what gem is, it’s basically all the dependencies required by Ruby on rails. Just like npm packages for Node.js.
You might get an error like
“rake aborted! Errno::EACCES: Permission denied @ dir_s_mkdir — tmp”
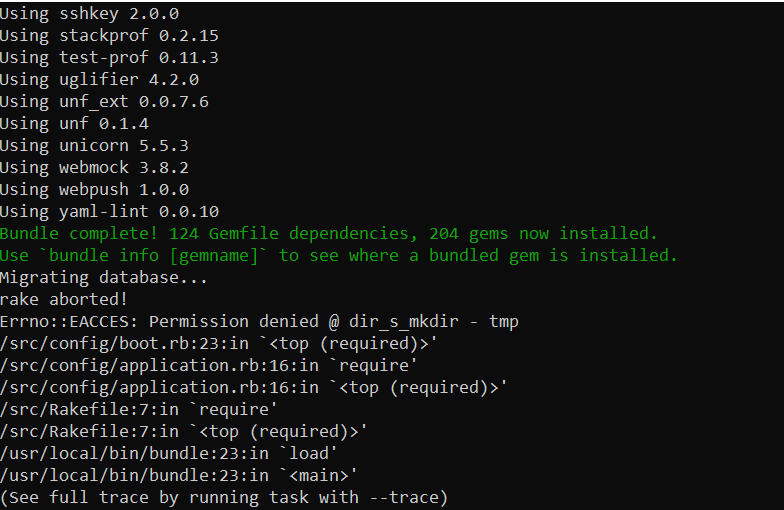
Simply run
sudo chown -R vagrant /vagrant/discourse/Here, chown is used to change the owner of file system files, directories. The vagrant enclosed by a red marker means the hostname and the path enclosed by blue markers is the current directory path. “pwd” returns the current working directory name.
Now kill the current running docker using
d/shutdown_devfollowed by
d/boot_dev — initIn case you get the following error
rake aborted! PG::ConnectionBad: could not connect to server: No such file or directory
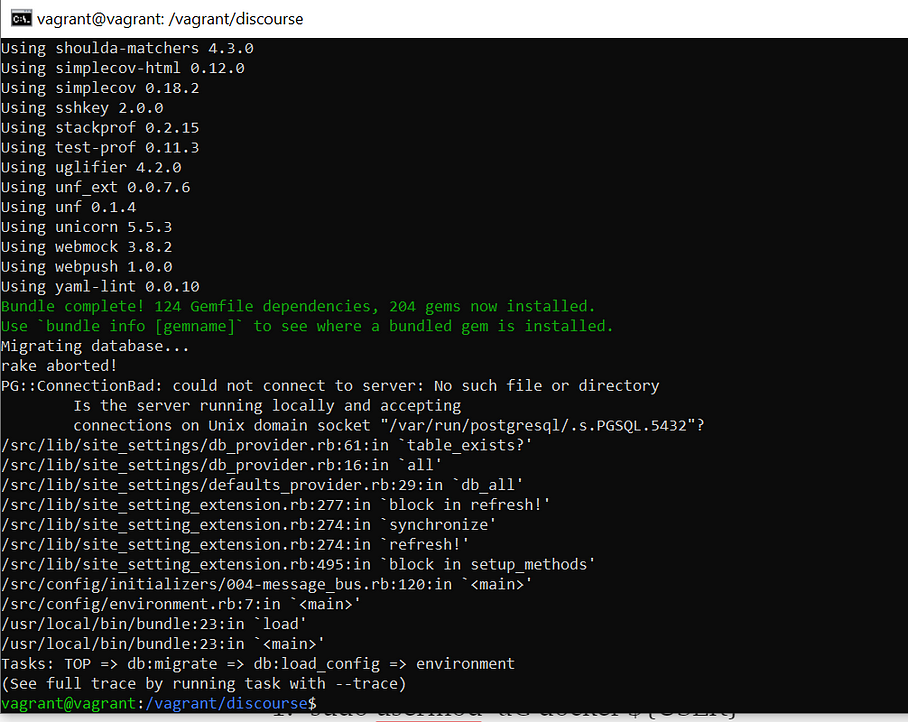
Simply run
sudo rm -fr dataand then
d/shutdown_dev
d/boot_dev --init
In case you get something like
docker: Error response from daemon: Conflict. The container name “/discourse_dev” is already in use by container
docker stop container_id
docker container rm container_id
or simply
d/shutdown_devIf you encounter an error like “permission denied while trying to connect to Docker”, Run:
sudo usermod -aG docker ${USER}
sudo service docker restart
cd /vagrant/discourse
d/boot_dev — init
If you get an error like “/discourse_dev” is already in use by container.
d/shutdown_dev
d/boot_dev --init
If everything works fine you’ll see a prompt asking for email and password
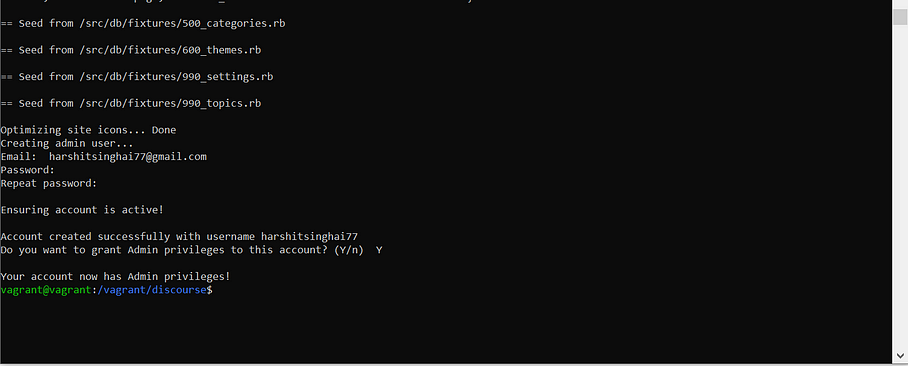
Almost there !!!
Pheww!! You’re almost done. It’s all glory from here.
d/shutdown_dev
d/boot_dev -p
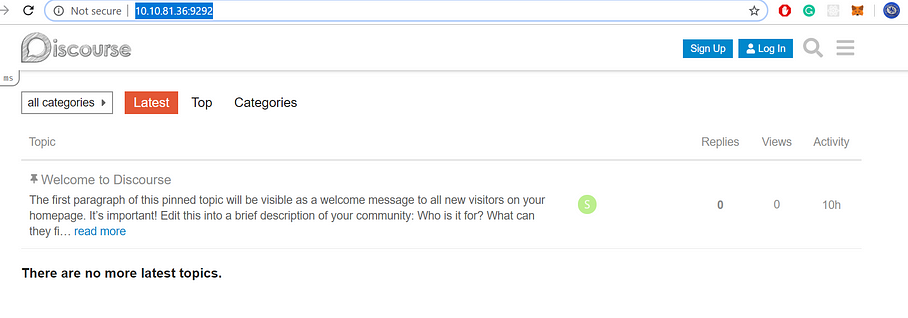
d/unicornGo to http://10.10.81.36:9292/ or whatever you used in your vagrant config file. Remember to go to the IP address:9292.

Once you close the discourse server by stopping the container with “d/shutdown_dev” you can exit from the guest os using “exit” command.
Next time if you want to boot the discourse server, no need to run “d/boot_dev — init”. Instead, run
d/boot_dev -pthis will globally expose the ports from the container to the network use.
Running Discourse after the initial setup
The following are the steps to run the server once you’ve done the initial setup.
vagrant up
vagrant ssh
cd /vagrant/discourse
d/shutdown_dev (if the container is already running)
d/boot_dev -p
d/unicorn
That’s it you've successfully installed Discourse on Docker using Vagrant.
Gracefully Closing Vagrant VM
If you want to exit from the machine and completely put the vagrant VM to sleep or stop running it in the background

FAQ (Here is the list of most frequent errors)
-
fatal: could not create work tree dir ‘discourse’: Permission denied — Try the command with sudo
-
docker: Error response from daemon: Conflict. The container name “/discourse_dev” is already in use by container container_id. You have to remove (or rename) that container to be able to reuse that name — Run d/shutdown_dev command to shutdown the container.
-
If you see errors like “permission denied while trying to connect to Docker”, Run: sudo usermod -aG docker ${USER} and sudo service docker restart.
-
rake aborted! Errno::ENOTSUP: Operation not supported — copy_file_range — Restart the whole process again. Exit the guest os by command “exit”. Run “vagrant reload — provision” and start the whole installation process again. This is the easiest way, you could also look up on the internet and comment below if you find the solution.
-
While running “d/unicorn” you could get something like “Could not find ruby-prof-1.3.0 in any of the sources” simply Run sudo d/bundle install to install missing gems. And then
d/unicorn.
References
Beginners Guide to Install Discourse for Development using Docker
That’s it for today. See you soon.